Back on December 12 I wrote that my current batch of mead had pretty much fermented dry, and that I planned to let it sit for a week or two before racking. Well, on December 24 I took that step, and racked the dry mead into a three-gallon glass carboy. I have to say (and this was my experience with the old Mr. Beer fermenter as well) that having a spigot at the bottom of the vessel makes racking sooooo much easier than siphoning from the top of a carboy.
I placed the primary vessel on the raised level of the kitchen bar, and set the glass carboy in the sink, linking the two with a clear siphon hose. Needless to say, I sanitized the hose and carboy with bleach (and thoroughly rinsed) prior to this step. I removed the airlock from the primary and stuffed a wadded paper towel in the opening, so as to allow air to flow but limit other contaminants.
As the mead transferred itself to its new home via the miracle of gravity, I prepared my secret ingredients that will turn this somewhat bland wildflower honey wine into a spiffy-keen metheglin. First up: Vanilla beans. I used two Rodelle Madagascar vanilla beans, mainly because that was readily available at the local HEB Plus. No Mexican vanilla beans to be had, unfortunately. I split these beans in two and the pasty innards immediately began throwing off a rich, sweet vanilla scent. Very nice. The potency of these beans is significantly higher than the previous beans I used, as I remember, although that was three or four years back and my memory isn't always accurate.
Next up, Icewine Tea. We picked this up a few years ago on a brief visit to Vancouver, and it turned out to be an amazing addition to a previous metheglin. Essentially, it's tea infused with ice wine and/or the pre-fermented juice from grapes destined to become ice wine. Most icewine tea is black tea, and I'd assumed for a long time that's what this was. But now that I look at the label, I realize this is herbal tea, not black. The "herbal" ingredients include rooibos, rosehips and hibiscus. I'm not a huge fan of rooibos, but in hindsight the earthy/spicy notes that worked so well in the icewine tea metheglin I made before are directly attributable to that rooibos. Curious.
Into the three gallons of mead, I added the two split vanilla beans and six bags of icewine tea.
Here's a closer look. In the days since, dissolved CO2 in the mead has gradually worked its way out of solution and pushed the tea bags up into the neck of the carboy. This has resulted in some of the mead and bits of vanilla bean bubbling up through the airlock. Yeah, that's a little messy. I've punched it down, and it seems like we've finally reached a sort of equilibrium. Already, the vanilla notes are pretty strong in the samples I've tasted, but the tea isn't noticeable yet. I'll check again in another week to see how it's progressing.
Now, we're entering unknown territory. I harvested the leftover Wyeast 1388 from the primary by "washing" it. I added roughly a gallon of boiled (then cooled) water to the primary and sloshed the mixture around to suspend the yeast, then let it settle for half an hour or so to let the trub--dead yeast and other impurities--precipitate out. Then I decanted into a large jar, and let the process of settling out repeat itself. Then I siphoned off the light yeast water into smaller jars, leaving the heavier fermentation leftovers behind. The Wyeast 1388 Belgian strong ale strain seems to be an outstanding performer for mead, at any rate, that I want to perpetuate it for future use. I ended up with five pint jars, which I placed in the refrigerator of safe keeping.
Which brings us to the apfelwein segment of our show. I've made several batches of German-style apfelwein in the past using variations of Ed Wort's recipe, and I drank the last remaining 12-ounce bottle back in November. So I've been hankering to make some more. This time, however, I've decided to use the Wyeast 1388 rather than the recommended Montrachet wine yeast, because I suspect the 1388 might preserve more of the apple flavor and aroma, as well as perform better at higher fermentation temperatures. Which, in theory, would produce a drinkable product in a shorter period of time (technically, one isn't supposed to use second-generation yeast for fermentations differing from the initial pitch, ie this yeast is attuned to honey from the previous fermentation, so isn't optimized for cider or beer or wine. I'm not convinced such evolutionary adaptations will be apparent in the second generation, so that's a risk I'm willing to take). I picked up three gallons of plain apple juice from HEB--always check to make sure there are no preservatives other than ascorbic acid. Another variant to the basic recipe I'm trying is the addition of undiluted apple juice concentrate to the juice, to increase the sugar content whilst simultaneously increasing the apple-intensity. I'd originally planned on adding four cans of concentrate, but the kids took one to make some juice.
The specific gravity of the concentrate/juice mix at this point was 1.060, which would ferment out to a 7.8 percent alcohol content. Ph at this point was 3.6. I want a little higher content to increase its keeping and aging stability, so I added 14 ounces of cane sugar, bringing up the specific gravity to 1.070. That should ferment out to around 9.1 percent ABV, which is in the range of a good riesling wine. To bring the ph up to make the must more hospitable for the yeast, I added 1 tsp potassium bicarbonate. Also, adapting the BOMM process I used for the above-mentioned metheglin, I added 3/4 tsp yeast nutrient and 2.25 tsp yeast energizer to the must. This is different from the DAP and Fermaid K I added to the honey must last go-round, but apple juice has a lot more nutrients in it for yeast to thrive on than honey does, and the basic apfelwein recipe doesn't call for any additional nutrients at all. I suspect I'm safe.
So, how to mix all these additives together and effectively aerate the must? I'm glad you asked! I just happen to have a new toy that came in shortly before Christmas that I've been wanting to try out--a drill-mounted wine degasser. After sanitizing it, I tried it out.
Works pretty well, huh? I whipped the apple juice and such up into a pretty good froth. Afterwards I checked the ph and found it to be around 4.8, which should keep the yeast happy. Earlier, I'd taken one of those bottles of yeast from the fridge and, after letting it warm to room temperature, added it to a quart jar half-filled with apple juice and a teaspoon of Go Ferm yeast nutrient. After six hours, give or take, I pitched it to the apfelwein must.
Today, the fermentation is steady although not as aggressive as I'd expected. There's a donut ring of kreusen that's formed, and a significant amount of foam built up when I degassed, but overall this is a sedate, restrained fermentation. I'm going to keep a close eye on it to make sure it doesn't stall out.
Now Playing: Whitehorse The Northern South vol. 1
Chicken Ranch Central
Showing posts with label honey. Show all posts
Tuesday, December 27, 2016
Monday, December 12, 2016
Homebrew update
Time for an update on the 3-gallon batch of mead I began last week. The must hit the 1/3 sugar break (that means 1/3 of the total available sugars had been consumed by the yeast) on December 5 with a 1.054 specific gravity reading. Following the BOMM protocol, I gave nutrient additions of .75 tsp of DAP and 2.25 tsp of Fermaid K. For the record, I pitched the yeast December 2 around 11 p.m., so I hit the first sugar break at less than three days. I expected the ferment to progress a bit more slowly than it has, as I pitched the yeast directly from the packet rather than building up the yeast numbers via a starter colony, but the yeasties didn't seem to be phased in the slightest.
The temperature has read consistently around 70F. I degassed 3-4 times daily (shaking the fermentor vigorously to release dissolved CO2 from suspension), but no matter how long I shake there's always more CO2 blowing out. A strong yeast smell came from the airlock, and no off odors at that point.
By December 8, the sg reading was 1.020, meaning the must hit the 2/3 sugar break of 1.027 early that morning. I degassed and pitched .75 tsp of DAP (I was getting getting close to the 9 percent alcohol cutoff, at which point yeast cannot metabolized non-organic nitrogen, but not quite there yet) and 1.25 tsp Fermaid K rather than 2.25 tsp, because that's all that I had left. The temperature was around 69F. The ph reading was 3.6. I hoped the additional nutrients I pitched were enough to keep the yeast from stalling out, as the additions were well short of the recommended BOMM nutrients.
I took a taste, and even at that stage I could say this was shaping up to be the best mead I've ever made. It was very clean and smooth, no harsh fusel alcohols present at all (and I know from fusels). It was floral, lightly sweet with strong citrus overtones. It was somewhat effervescent despite the degassing, so I wonder if that contributed to the citrus?
On December 9, Less than 24 hours later, the sg reading was 1.004. The temperature of must was 69F. Citrus still predominated the taste, with some yeastyness creeping in. It was beginning to taste a little hot, with a faint hint of fusels present. I guess the Wyeast 1388 wasn't entirely happy with my skimping on the Fermaid K the last feeding. Fortunately, there was absolutely no sign of this one stalling out. It was the fastest ferment I've ever seen.
On December 10, sg reading hit 1.000, meaning all sugar had been consumed and fermentation was over. The flavor was dry, yeasty, with some moderate harshness from fusels, but not a tremendous amount. The citrus aspect was much diminished. The final alcohol levels were around 10.4 percent. I'd wanted it to be slightly higher, so I dissolved roughly 13 ounces of honey in about a cup and a half of warm water and pitched it into the mead. Renewed fermentation should bring the final alcohol levels up to around the 11.5 percent mark. I expect the renewed fermentation has already finished by December 12, but there remains dissolved CO2 coming out of solution that keeps the airlock bubbling regularly.
The plan now is to let it sit for a week or two and clear, with the suspended yeast and other particles settling out of the solution. Once it's fairly clear, I'll rack into a 3-gallon carboy and begin adding spices and such to turn it into a metheglin. At this point, I'm pretty optimistic I'll have a good, drinkable mead in just a few months. Fingers crossed.
Now Playing: Emerson, Lake and Palmer Return of the Manticore
Chicken Ranch Central
Sunday, December 04, 2016
Return of the meadmaker
As I write this, it's been just over four years since I last started a batch of mead. I've made beer/ale since then, but not mead. Considering that batch is what gave me the ice wine metheglin that received favorable reviews at the 2014 Texas Mead Fest. What made that batch successful (at least the ice wine version--plum and pear didn't turn out so well) was the fact that I'd finally learned the need to degas the must daily to release all the dissolved CO2 that can become toxic and stress the yeasts, as well as keep the fermentation temperature low--below 70F at least. I'd gotten into homebrewing by making ales, which ferment normally at high temperatures using (duh) ale yeasts. Put wine yeasts in the same conditions, and they stress greatly, creating fusel alcohols and off-flavors. So it only took me a decade of making mediocre meads to learn this--what can I say? I'm a slow learner.
Now, however, I was ready to put that earned knowledge to work. One problem though--the big, 6-gallon Mr. Beer fermentor (pictured above) was no more. Back this summer, when I brewed up 12 gallons of "In-The-Buff Brown Ale" for my book release party, I discovered the entire bottom of my Mr. Beer was ringed with deep cracks. I learned this when I tried to sanitize it for the wort, and the water I poured in spewed out the bottom almost as quickly. Color me depressed. I had other fermentors for the beer, but the Mr. Beer was special. Follow: Back when The Wife and I were planning the whole wedding thing, I went with her to Target, JC Penney and Dillard's to do the whole bridal registry thing. There's a reason it's called a bridal registry and not a groom's registry. The entire day (it was a Sunday, if memory serves) consisted of her saying "What do you think about these bed sheets?" or "How do you think this silverware would go with the china?" To which my replay was a variation of "Whatever you want." Late in the day, being quite tired and more than a little disinterested, I turned a corner in Dillard's and there it was, a huge Mr. Beer display at the entrance to the Men's section. My eyes lit up. A choir of angels began to sing in the distance. The Wife-To-Be said "Absolutely not." It was a preemptive no before I could say anything but I was not deterred. "Look," I said, "our wedding registry has 597 items picked out on it, of which I've contributed zero. I think I'm entitled." So I took the little barcode scanner and added Mr. Beer to our registry.
The next day, when I got home for work, that Mr. Beer was on the dining room table, waiting for me. Having it on our registry so mortified her that The Wife bought it for me just to keep it from the list. And I've been home brewing ever since. I particularly loved the Mr. Beer because it was clear, PET plastic, which let me watch the fermentation as it happens. That's not the case with opaque buckets. So when Midwestern Supplies had 6-gallon "Big Mouth Bubblers" on sale for Black Friday, including free shipping, I could not resist. These, like Mr. Beer, have a spigot, so there's no need to siphon. That makes racking and bottling very easy. It came in on Thursday. To get it ready, I needed to clean and sanitize it. Many homebrewers look down on using chlorine bleach for sanitizing, but I've had good success in the past. I capped the bung at the bottom with a borrowed spigot from a plastic bucket fermentor I have, and tossed all the other parts into the Big Mouth Bubbler, added a couple cups of bleach and filled up all the way with water in the walk-in shower. After that, I let it sit for the better part of a day.
I decided to put to use all my accumulated knowledge of meadmaking and approached this batch differently than in the past. I've learned a lot more about honey, for starters, and that a disturbing amount of bulk honey--even that labeled as North American sourced--is actually laundered from China and India, and contaminated with pesticides, antibiotics, etc. The way those countries get around bans on their contaminated product is by super-filtering to remove pollen. Honey's place of origin is determined by analyzing the unique pollen found therein, so if all the pollen is filtered out, there's no way to discover where it originated. In light of that, I went semi-local, and bought 7.5 pounds of Walker Honey Farm wildflower honey from HEB. They're based in Rogers, a town I know fairly well, and are the folks behind Dancing Bee Meadery, which produces some pretty decent meads. Also, I planned to make only 3 gallons this time. In the past I've always tried to make 6 gallon batches, and that's a lot of time and money gone to waste if it sucks. I figure 3 gallons is more manageable (one gallon batches are so small they're not really worth the effort).
First up, I had to dissolve the honey in water to make it fermentable. Honey is so dry, so to speak, that yeast and bacteria cannot survive in it. This is why honey is so resistant to spoilage. I heated a gallon or so of tap water on the stove to about 140F. Lots of homebrewers frown on using tap water, but I like New Braunfels tap water. Really, any place that gets its water from the Edwards Aquifer is going to have pleasantly-flavored water. Many meadmakers also frown on heating honey. I've long since passed the stage where I worried about contamination and pasteurized the honey for 30 minutes or more. I just heat the water because the honey dissolves so much more quickly that way. At 140F I cut the heat off, and as I stir in the honey, the temperature of the water drops quickly, so I'm not losing any significant flavors or aroma to boil-off.
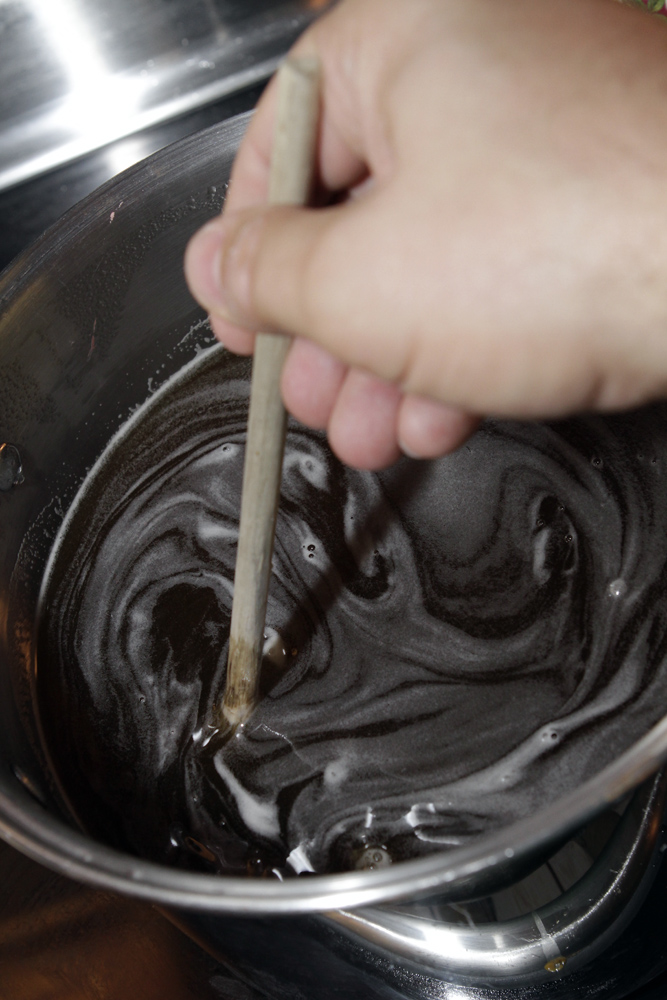
Lots of stirring with a sanitized spoon to ensure it's all mixed in well. I keep intending to get a longer, plastic or metal spoon dedicated to homebrew, but have not yet gotten around to it. Again, some other brewers may look upon my use of a wooden spoon with horror, as it could be harboring all types of bacteria and wild yeasts, but it's fresh out of the dish washer and I've not had problems before.
In a tea kettle, I heated up some additional water to approximately 140F. This, I poured into the various jars of honey--now mostly empty--to recover as much honey as possible. There were some pretty thick layers of honey on the sides and bottoms of those jars.
After pouring in the hot water, I screwed the lid on tightly and shook like the dickens. You can see how much honey I recovered from those jars by the yellow hue the water took on. I poured this water in to the main pot and mixed everything together.
By this time, the honey-water mixture had cooled to below 110F, so I covered it and set it aside to continue cooling.
Now here's where things get interesting. The mead recipe I'm following this time is Bray's One Month Mead--known popularly as BOMM online. This did not exist the last time I made mead. It was invented by a fellow named Bray who experimented with using a bunch of different Belgian ale strains that had high gravity and high alcohol tolerances to find which ones might be useful for mead. Most beer yeast is stressed and/or killed by alcohol levels approaching that of wine, making them inappropriate for the most part. But Bray found that Wyeast 1388 Belgian Strong Ale produced a quality mead quickly at relatively high temperatures. The yeast's listed alcohol tolerance of 12 percent is solidly in the lower range of wine, so that's a plus. Until now, I'd only used dry yeasts--liquid was new for me. But I activated the packet as instructed and set it aside for six hours of so for the yeast to build up momentum.
I emptied the fermentor of the bleach water and rinsed it out thoroughly. You don't want to skimp on this part--bleach is not a good addition to mead or beer. Once everything was clean, I assembled the proper spigot in the bung and set up the airlock in the lid. With the honey-water must cooled, I poured that into the fermentor, then added cool water to bring the volume up to a shade over 3 gallons. To this, I added the additional ingredients as called for in Bray's recipe, tripling the dosage for my 3 gallons (his recipe was for 1 gallon): 3/4 tsp of diammonium phosphate (yeast nutrient) and 2-1/4 tsp of Fermaid K (different type of yeast nutrient). I then added 2-1/4 tsp of potassium bicarbonate. The original recipe calls for potassium carbonate, but that's not so easy to come by and I saw that most people online are successfully substituting the common bicarbonate with no ill effects. Shortly after this, I saw that Bray also has a 5-gallon version of his recipe up, which calls for 3/4 tsp of potassium bicarbonate--the same amount the one-gallon recipe called for, which I tripled. Oops. Will this negatively impact my mead? We'll find out. The immediate result was a ph reading of roughly 5 (the winemaking ph tester only went as high as 4.4, and it appears my color was slightly darker than 4.4) which is higher than honey's native acidity. Hopefully this will make the yeasts happy.
After pitching the yeast, I measured the specific gravity at 1.080, adjusted for temperature at 70F. If this is accurate (and it should be--reading a triple scale hydrometer is pretty straightforward--the mead should finish up around 10.4 percent ABV. This is a little lower than I'd intended. I the past, I've used 3 pounds of honey or more in my mead, and they tended to run closer to 14 percent ABV. Using the ale Wyeast 1388, I used just 2.5 pounds per gallon, shooting for a final ABV around 11-11.5. Depending on how the primary ferment goes, I may add a bit more honey in the secondary to boost that some. We'll see. The important thing is, the yeasts are happily fermenting away, and just a short while ago I shook the fermentor vigorously to release any built-up CO2, and was rewarded by a huge foaming eruption. Fortunately, the fermentor being only half-capacity allowed plenty of space for the degassing to rage. Fingers crossed that this one will be a winner.
Now Playing: Benedictine Monks of Sanot Domingo de Silos Chant Noel
Chicken Ranch Central
Thursday, August 21, 2008
Return of the Meadmaker
So I bottled my mead. Finally. Actually, what prompted this undertaking was no great strategic plan on my part but rather the drinking of my last bottle of nut brown ale (recall my side trip to Austin Homebrew Supply during Armadillocon). I'm out of beer, and I tend to save my alcohol budget for really exotic beers or wines or spirits. Random drinking beers I like to brew myself, hence the need to empty the fermentation vessel of mead.
Because it was easiest, I bottled the 1.5 gallon batch of maypop mead first. It'd settled out very clearly, was a pale yellow, and looked innocently appealing in the bottles. I got six bottles worth once all was said and done, and took a taste as well. The exceptionally long time I've aged it in the fermentation vessels (I started them out in January) was quite apparent with the maypop--it tasted like a very, very mild chardonnay. Better than my first effort at fermenting a straightforward mead, but as a melomel the fruit was practically nonexistent. The medium-toast French oak chips were not very strong of presence, either. I'd worried that leaving them on the mead for three weeks was too much, but it's obvious three months would've better served me. That, and adding a LOT more passion fruit. Maypops have a milder flavor than commercial passion fruit, but geeze, I didn't expect it to be invisible. This mead will be consumed in due course, but it'd appeal most to people who like light beer and anemic white wines.
The blueberry mead on the other hand, has got some kick to it. The color is a pretty purplish amber, and it still has that harsh mead medicinal taste. Not mild at all at this point. The flavors are still muddled, but there's something there as far as flavor character goes that the maypop lacks. It's also fairly dry, not sweet at all (nobody will be confusing this with the prickly pear!). I ended up with 23 bottles of the stuff once all was said and done, with only the final three bottles having significant sediment issues. This is one that will benefit greatly from extended aging (at least, that's my hope).
I've already got enough honey on hand to start a new batch, but that'll have to wait until I've scratched my beer itch with this "dark ale" kit, which I'm going to make using equal parts of dark malt extract and honey (yeah, I can't wean myself entirely from the honey--this will be my first attempt at using it in beer). In the interim, I can work up some labels for the mead (and, truth to tell, I've yet to properly label those half dozen bottles of mint metheglin from last summer, either).
Now Playing: Clandestine The Ale is Dear
Subscribe to:
Posts (Atom)