In my last update, I showed how I'd finally gotten the far corner upright into position, along with the end cabinet and laid down some pretty heavy-duty vapor barrier. I finished up by showing the big stack of shelving I'd cut. If you keep in mind the fact that these reports aren't going up real time, it will be easier to take in the fact that staining and varnishing all those shelves took a very, very long time to complete. We're talking a month to six weeks. The problem comes back to weather--often it was too humid or too cold to apply the various stains and polyurethanes, particularly at night, when I was most likely to have time to work on them. On the staining, I didn't cut corners and go with only one coat of Minwax's "Special Walnut," although I was sorely tempted to on occasion. No, I stained everything, let dry for a day then flipped the shelves over and stained the underside. Once that was dry, I broke out the "Dark Walnut" and repeated the process. In case you're wondering, "Dark Walnut"
still is akin to painting with molasses. It's just so thick and gummy in comparison to other stains. Ugh. It slowed the process down a lot.
Once the staining was done, then came the polyurethane. Here's I cheated. The cheap radiata pine plywood I'm using is only sanded smooth on one side, with the other being fairly rough. The smooth side will be the top of the shelf, and the rough side the bottom. For the bottom, I'm only applying one coat of polyurethane, and not sanding. I feel a little guilty about this, because it's not completely professional, but I don't know of anyone who is going to feel the undersides of my shelves and criticize me for it. It may be more prone to dust collecting, but that's something I'll have to live with. As for the top sides, I applied two coats of polyurethane, sanding in between. In an ideal world, I'd have applied a third coat, since polyurethane doesn't build up as thickly or smoothly as sanding sealer, but I'd like to finish this before I retire, so two coats it is.
One final note--because the plywood was inexpensive, it did not come without blemishes. The thin surface veneer on the smooth side was cracked and warping in a handful of places. This resulted in 4-5 shelves (including one of the diamond-shaped corner pieces) with notable surface defects. They're not smooth. Flipping the board upside down was out of the question unless I wanted to spend hours sanding down that rough surface and re-varnishing (which I didn't), so I made an executive decision to use the ugly boards for the top shelves, which are about 8 feet up and unlikely to suffer close examination. So, yeah, I'm hiding my mistakes.

And speaking of mistakes, the one thing that bothered me the most about my old office bookshelves, and still nags me to this day, is the fact that I didn't build a "top" into it. That is, the white ceiling could be seen when looking up at the top of the shelves. It's a little thing, maybe, but jarring to me. In the photo above, you can see what I'm talking about. That little white sliver between the books and crown molding might as well be a flashing beacon as far as I'm concerned. With this new bookcase, I would not make the same mistake twice.

So this is what I did. I went back to the area lumber yards and found the thinnest, cheapest plywood sheet I could find. What I came up with was something called "Utility Panel" that cost me $9. Keep in mind that hardwoods--oak, etc.--are considered the beauty woods, while softwoods--evergreens like pine, etc.--are not pretty and considered suitable for structure use. Probably 95 percent of my bookcase is pine or other softwood (which doesn't necessarily mean it's soft, that's just a broad classification), so I'm spending significant effort to make it look nice. This utility panel stuff isn't something you'd want front and center, but for my use it is going to go mostly unnoticed, and that's just fine.
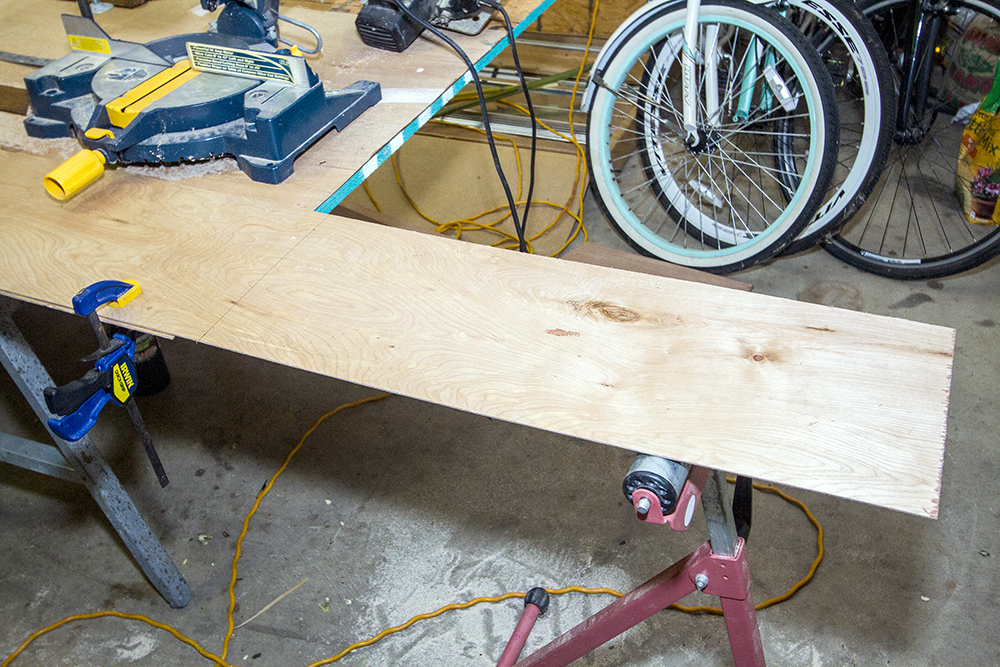
First off, imagine I walked you through the whole staining process on one side of this utility panel. Just one coat, "Special Walnut," like I applied to the lauan paneling for the back of the case. Fortunately, the stain comes out pretty dark on this wood, which is what I want. Next, imagine I documented using my circle saw to cut an 11" wide strip down the length of the panel. Got it? Great, you're caught up then. I measured the distance between the shelving uprights where they meet the ceiling, and that comes out to roughly 29.5". So I mark 29.5" on the 11" wide strip, above, then cut with the circle saw, below.

Now, remember that 2x4 I sliced up into triangular sections a while back? Imagine I stained them and varnished the widest face on each. Now, since they're all clean and pretty, I cut a couple of 29.5" pieces from them.
Now, I pair those triangles up with the stained utility panel section. See what I'm doing with them?
Before I install the pieces, I need to mark where the wall studs are. Remember, I've been using wall and ceiling marks, but these are about to be covered up. I use blue painter's tape for this purpose, mainly because that's the first thing I found.
Next, whilst holding the ceiling panel and triangle brace in place, I drill two pilot holes through the brace into the wall stud. Then I used a larger bit to give the screws a shallow depression to countersink into. Then I screw in the screws. That sounds pretty straightforward, but it a bit more challenging when you have to change the drill bits one-handed, since the other hand is holding the wood in place. I'm sure there's a simpler way to do this, but I've never claimed to be the sharpest nail in the box when it comes to carpentry. I also drilled a pilot hole through the upright to the right, and ran a long, 3" screw through it into the triangular brace. Repeat as necessary.

Once the back brace is in place, I attach the front brace to the uprights. Same drill applies, first the pilot holes, then a countersink hole, then I put the screw in. Despite my efforts, I split the wood on three of my first four efforts. It's not pretty, but this will be covered by crown molding eventually. Holding the ceiling piece up is its primary job--structural bracing is minimal, mostly just to ensure the uprights are parallel until I can get the shelves in.
Those screw holes are pretty unsightly, so I fill them with wood putty. Once they're dry, I hit 'em with a splash of "Dark Walnut" and they're not nearly as noticeable. Yes, I've learned my lesson with "Dark Walnut." It's good for these little details but you have to wipe up the excess
immediately.
So, with the uprights in place, the time came to install the shelves. The 9" wide end shelves were a little tight in some cases, but a few whacks with the rubber mallet got them in place nicely. The next column of 30" wide shelves slid into the routered dados just as pretty as you please. The next column? No so much. Back when I routered the base of the uprights to make everything fit, well, this middle column of shelves gave up more space than the rest, and came out almost exactly half an inch narrower than any of the other columns. So after testing the proper length to fit on a piece of scrap lumber, I ran five shelves across my table saw to trim off that extra half inch. The result was a perfect fit, and a few whacks with the rubber mallet got the top shelf in, correcting a slight bit of warp in the right upright. The final column of shelves went in nicely, the result being one wall that is finally starting to look like bookshelves.
Now Playing: Billy Joel An Innocent Man
Chicken Ranch Central


No comments:
Post a Comment