Back when we moved in to the new house, before the Lagoon of Mystery was even the inkling of an idea, The Wife purchased an outdoor table and chair set to go by the pool. It was one of those tables with a top made of tempered glass, with a hole in the middle for a large umbrella. For five years, it served us well. Then last fall, a sudden thunderstorm swept in with gusty wind. Before we had a chance to react, the wind had caught the umbrella, lifted the table off the ground and slammed it back onto the patio with enough force to reduce that tempered glass to a million little pieces.
This is why we have a strict "no glass" rule in the Lagoon. All these shards took forever to clean up. Some found their way into the pool (yikes!). And this was tempered glass. Imagine how bad it would've been with regular glass.
Once cleanup was complete, we were still lacking a table. We weren't thrilled with the idea of shelling out a lot of cash for a replacement, so I did what I always do--figure out a slightly-less-expensive-but-way-more-time-consuming alternative. The table's metal frame remained intact, so all I needed was a new top. My primary concern was that the replacement table be shatterproof, with "filling into the tiki vibe" a close second. After some thought and price shopping, I settled on tongue-and-groove western red cedar planking. The tongue-and-groove would offer stability and the western red cedar is fairly light and resistant to decay.
The frame was a little less than 4' across, and the cedar planks came in 8' lengths, so I split each in two before assembling them atop the frame. It started looking like a table right away.
Next, I flipped the whole assembly over...
...and used a jig to trace a 2" (give or take) lip around the frame. The glass set within the circumference of the frame, but making the wood fit inside would be nightmarish. My solution would be to set the wood on top of the frame. I'd have to come up with a new way to anchor it, however. That lip would come in handy for that.
The planks, though slotted together, still moved freely. To trim them to shape, I had to clamp them down. I soon discovered that even clamped, they were prone to movement. Hilarity ensued.
Some of the above-mentioned hilarity. Jig saws don't make the prettiest, or most controlled of cuts. But sometimes they're the only tool for the job.
Once all the planks had been cut to form, I used my large router to bevel the edges. I learned with my porthole build that something as simple as a bevel gives the end result a finished, professional look. I wanted the table top to look like a table top, as opposed to a bunch of planks pressed into service.
Next was staining the planks with Minwax special walnut, to match the other woodworking on display in the Lagoon.
Once the stain dried, I applied several coats of Flood weather sealant, because even cedar takes water and UV damage when left outside all year. Those cedar planks are starting to look quote nice! Also, I should point out that the planks came with one rough side and one smooth, sanded side. I used the smooth side for the table surface, for obvious reasons.
I used Titebond III--one of the most durable wood glues out there--to secure the tongue in the groove.
And this is what the table top looks like when it's fully assembled. I let it dry for 24 hours, then let it dry for an additional 48 or so because I was busy and couldn't get to it.
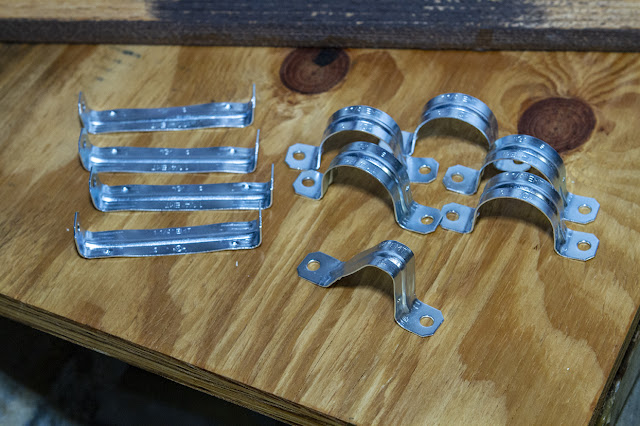
But now the $64 question: How to anchor the wooden top to the steel frame? I hit upon using brackets--conduit straps--to attach the top to the frame. The brackets didn't come in the proper shape, but they were easy enough to hammer flat, then use pliers to work them into the proper angles.
As I didn't want shiny silver metal (or even dull silver metal) attracting attention, I put the brackets into a box and spray painted them matte black.
The moment of truth.
Much to my surprise, my bracket scheme worked pretty well. Using a power drill, I quickly went around the table and had it solidly secured in no time. In fact, I moved a little too quickly--you can see some rust spots on the frame. I'd intended to sand those spots down and apply a new coat of paint. That would've been the responsible thing to do. But I just wanted to get the darn table fixed, so I skipped that part. Maybe I'll get back to it someday.
Flipping the table over, I found very little play in the wooden top. It stayed in place, and didn't shift when moved. The planks didn't pop free. It acted like a table, much to my relief.
Once I got it back out by the pool, it only took a few moments to position the umbrella base and slot the tiki umbrella through the center hole. It looks for all the world like it belongs there, doesn't it? Miracles never cease!
This installment of the build-along might not have been as cool as some of the others, but it certainly was necessary. I have some more coming up that will be more interesting, so stay tuned.
Now Playing: Pink Floyd Dark Side of the Moon
Chicken Ranch Central


No comments:
Post a Comment