I started my
office build-along project a couple of weeks ago, and last week I
gave an update on my progress. A week's passed, so that means we're due for another update, right?
For those of you playing along at home, you'll remember my mentioning the first cabinet I purchased for this project was a corner piece from McCoy's that was on clearance. Turns out it wasn't spruce, but birch. Which is another way of saying it's a pain-in-the-ass. That's it below. Deceptively innocent-looking, innit? Well, it was a display model, which means it was filthy. I mean, really, really grimy. So much so that I broke out the acetone to wipe it down after using an air compressor to blow the biggest accumulations of dirt and dust away, and again after I wiped it down. Even after the acetone, it still looked questionable. Part of this is due to UV damage--you can see in the photo where the door that was covered by a price sheet is still bright and clean and the surrounding wood has yellowed. Not good. I sanded and sanded and sanded some more, and only evened the coloration out slightly.

As for the stain... well, there's a reason why I didn't share pictures of the birch. See, the birch has grain in the wood, clearly visible grain, but apparently not the type that likes to differentiate itself via Minwax wood stain. Both applications of Special Walnut and Dark Walnut resulted in vaguely blotchy patterns. Worse, in a handful of places the stain puddled of something even after I wiped it away, resulting in what looked like splattered water droplets on the wood that (naturally) wouldn't sand away. Ditto for the cabinet frame. The door doesn't look so bad in the photo below, but trust me, it's awful.
Cutting my losses with that mess, I moved on to the application of polyurethane. At the old house, I used sanding sealer to finish my book cases, and was very happy with that finish. I've studied up on woodworking since then, and learned that polyurethane is a more durable topcoat than sanding sealer. Sadly, the two are not compatible, so I couldn't layer polyurethane atop a nice, thick layer of sealer. The big difference, as I understand it, is that sealer has an additive that causes it to puff up (relatively speaking) evening out the surface and filling the wood grain so that it may be easily sanded to a slick, smooth gloss. Polyurethane doesn't puff up, but is still easily sanded--so multiple coats are needed to achieve the same degree of smoothness.

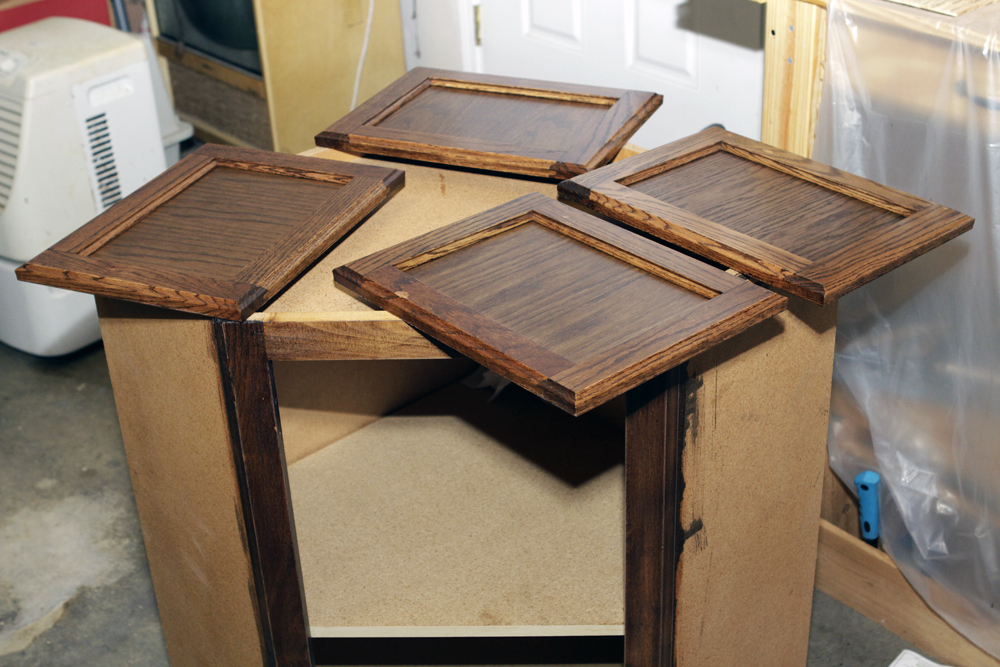
Another problem with polyurethane is that it is bubble prone. If said air bubbles persist when it dries, that a rotten little disfigurement to the finish. So the best way to prevent this is to brush on a thin coat and brush slowly. Then brush over it again to remove lingering bubbles. Then blow on those nasty little ones that persist, hoping that is good enough. Once the polyurethane dried--at least four hours according to the can, but a couple of days in my case--lightly sand away the imperfections and irregularities. I used 400 grit sandpaper. And by sand lightly, that's exactly what it sounds like. The polyurethane is indeed soft under sanding and can be stripped away with any degree of aggression. I took a little strip in my hand, ran my fingers over the wood to find rough patches, then brushed the sandpaper over a couple of times. That was usually enough to leave a coat of dust and a smooth surface underneath.

Once I'd sanded everything, I got a damp towel and wiped everything down. I can assure you, despite sanding lightly, there was a
lot of dust. This isn't something you want to breathe in, either, but fortunately it's a clingy kind of dust that doesn't seem prone to going airborne. Once I got everything cleaned up nice and pretty, I applied a second coat of polyurethane. I have to admit I cheated a little on the cabinet doors--the inside, which won't be exposed to as much wear and tear, only got one coating.
I found the second coat much more forgiving to work with--or not, as the case may be. In many cases, the first coat had rendered the surface pretty smooth to begin with, and the second coat took the cue. In those cases I dispensed with the sanding, although there were rough patches and bubbles here and there to work into submission. The birch door was an exception. It didn't want to get smooth, and after sanding, no matter how much I wiped, I couldn't get the dust cleaned up. Instead of merely blotchy, it was streaky
and blotchy. I briefly thought of breaking out the acetone again, but a quick check of the interwebz informed me that the acetone would strip the polyurethane away entirely. Yikes! In the end, I got it cleaned enough to apply a second coat of polyurethane and then followed that up by lightly sanding with 600 grit paper.
The end result, above, is a bunch of pretty cabinetry that's missing doors. But it stacks nicely, doesn't it?
Another lesson learned from the book case build a decade ago is that it's best to remove all the hinges from the doors before staining. Yeah, that worked out about as badly as it sounds. But the downside of this hard-won wisdom is that once all the stain and polyurethane has dried, the hinge hardware must be replaced. Turns out this is a terribly tedious affair. But, once all is said and done, it does foster the illusion that I actually know what I'm doing. Whoda thunk it?
Now Playing: Sting The Soul Cages
Chicken Ranch Central


No comments:
Post a Comment